Why this blog??

Why this blog?? I often find myself stressing over what to make for my family for dinner. We live a busy life and some meals need time to prep, cook and let's not forget shopping for everything you need. I love cookbooks and websites, but there are so many recipe's at times it is overwhelming. The recipe's I will be posting are things I actually made. I will tell you if they are easy or more time consuming. I will also tell you if they are good. Most of these are recipe's I have made for years and continue to make because they are easy or quick and my family loves them and i know yours will too! I will also try to at least once in a whlie try a new recipe I've found on line or in a book and honestly rate it. I always encourage others to send me their favorite recipe's as well! I am a mom... not a chef. But I am a mom who enjoys cooking for her family and making a somewhat healthy meal (some days more healthy than others:) ) In each recipe I will share how I recommend serving it, any substitutions I can think of that are also good, or ways to prepare ahead of time to make the cooking part seem quicker! I am not a photographer, as you can see... most of these pictures are taken from my phone camera, so may not be the best! I love to hear from others who have made these recipes and what they have done to change the recipe... please post comments! Thank you! To "like" me on facebook, go to this link... It's What's Cookin

Sunday, October 23, 2011

Easy Breakfast Muffin Quiches


A friend of mine gave me an easy breakfast idea that she makes for her family. She uses Pillsbury crescent rolls, bell pepper, cheese and eggs. I used what I had on hand and adapted to my family's liking. The thing I liked best about this is you can customize each quiche to what your family likes. I like veggies in mine, my daughter and husband don't... I think they would be really good with bacon in them as well!!

(I could not find our muffin tin this morning. We have a tin we use for brownies that are more rectangular, (You can see in the pictures), so i had to play with the biscuits to make them fit.

*1 tub of pillsbury grande biscuits (I pulled them in half to make them thinner (so a tub of 8 will make 16    of these) Or you can use crescent rolls and cut into circles.
*4 eggs
*cheese (I used shredded cheddar for most of them, and crumbled feta for ones with the veggies)
*chopped veggies (I used chopped frozen spinach and chopped fresh broccoli)
*1/4 cup milk
*pepper and salt

1.Spray cupcake tin with pam and place biscuit in bottom (i pinched them up sides about 1/4 of the way)
2.Put eggs, milk, salt and pepper in a bowl and beat well.
3.Place your cheese and any veggies or bacon on top of the biscuit.
4.Pour egg mixture over tops, only filling to halfway mark.
5.Bake at 375 for 12 minutes, or until eggs are cooked though. Use a toothpick to see if they are cooked through.

I had to use a rectangle pan, so i did 2 1/2 biscuits per rectangle and flattened them and pinched dough up sides 1/4 way.

I added shredded cheddar cheese into the ones for my husband and daughter

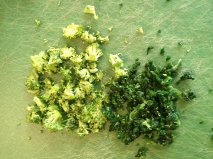
Chopped spinach and broccoli

The two on left are chopped spinach and broccoli, bottom middle has the veggies and cheddar, others with just cheddar

I did one egg mixture plain and one with crumbled feta that i used for the ones with the veggies.

pour egg mixture in so it is filled half way (they will rise as they bake


Quiche with broccoli, spinach and fat free feta

Quiche with cheddar cheese


YUM

Tuesday, October 18, 2011

Gingered Chicken Dinner


I found this recipe in an old Taste of Home magazine I had. It was submitted by Judy Komarinski from Greensburg, Pennsylvania. I was already defrosting chicken and planning to make Pineapple Teryaki Chicken with white rice and veggies. I've made it a hundred times and I came across this recipe and I already had everything in the house except for orange juice. It says to marinate overnight but I started it in the morning and marinated for about 8 hours before starting and I believe that was plenty time to marinate.

I went back and forth with whether or not to post this recipe. I've made some recipes in the past that we would never eat again, so I didn't bother to put them on the blog. I will probably never make this recipe again because it's just not flavors my family really liked. But it was an easy, quick meal to make and I can see some people liking it. I think it's missing something, but I'm not sure what:) I just don't know if the tang of the OJ and the ginger went super together.... but that's just me. I would love to hear from anyone who tries this and what their thoughts were.  One suggestion I have is to not use as much of the marinade with the rice. I would use half the marinade that is left and replace the remaining liquid with water or chicken broth. It was too strong for the rice. There is also way to much sodium in this dish. I recommend using low sodium soy sauce and omitting the extra salt as well!

So here is the recipe:)

Ingredients
* 1 1/2 Cups Orange Juice
* 1/4 cup soy sauce
* 4 garlic cloves, minced
* 1 tsp ground ginger
* 1/2 tsp salt
* 1/4 tsp pepper
* 2 boneless skinless chicken breasts (aprox 6-8 oz each)
* 1 T butter
* 1 cup uncooked instant rice (minute rice)
* 1 cup frozen broccoli florets, thawed

In a bowl, combine the first six ingredients. Pour half into a large resealable plastic bag; add the chicken. Seal bag and turn to coat; refrigerate overnight. Cover and refrigerate remaining marinade.

Drain and discard marinade from bag with chicken. In a small skillet over medium heat, brown chicken in butter for 2-3 minutes on each side. In a greased 8-in. square baking dish, combine rice with reserved marinade; top with chicken.

Cover and bake at 350 for 15 minutes. Top with broccoli, cover and bake 10-15 minutes longer or until chicken juices run clear (thicker chicken will take extra time).
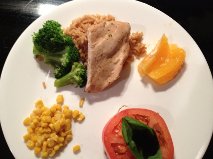
Yield: 2 servings (this was the perfect amount of food for my husband and I and our two small kids. We also served a side of corn, orange slices, Holiday grapes and caprese.

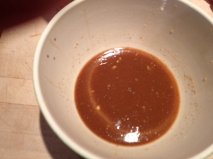
marinade

saute chicken in butter

mix remaining marinade with rice (I would use half of the remaining marinade and add extra water or broth)

place chicken on rice and bake covered for 15 mins


After it bakes for 15 minutes, add broccoli. Recover and bake another 15-25 minutes


Wednesday, October 12, 2011

Puruvian Chicken Pasta and Habanero Salsa


I love this pasta, with or without the salsa! You have to REALLY like spicy food to like the salsa. Use sparingly! A little goes a long way. I like spice... but I really like the flavor, as well as the spice, of this salsa. My husband won't go near the salsa. He really likes the pasta though so i just make the salsa for myself and any friends. The hardest part of this recipe is de-seeding and washing the habanero peppers! Make sure you use gloves and try not to inhale the peppers. IT HURTS!!

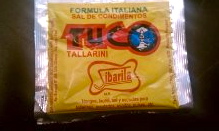
The other hard thing about this dish is finding the spice pack it calls for. I can't find them in the area where I live. I know they are sold in Miami. I've also found them on line. I would google to see if they are sold in your area. Here is the website I found for the TUCO seasoning to order on line.

Ingredients:

*1 can (14.5 oz) diced tomatoes
*1 can (14 oz) chicken broth
*1/2 can tomato paste
*1 box angel hair pasta
*1 packet TUCO seasonings
*1 red onion- large chopped
*2 garlic cloves- minced
*1 tsp cumin
*1/2 tsp pepper and salt
*3-4 chicken breasts

Salsa (optional) (recipe below)

1. Dice chicken and satay with olive oil until done. Remove chicken.

2. In same pan, place onions and garlic- satay

3. Add diced tomatoes, tomato paste, packet of TUCO spices, and cumin at this time. Cook on medium 5-6 minutes and stir well.

4. Add chicken broth. Bring to a boil. Cover and simmer for 10 minutes. While this is cooking, start cooking your noodles.

5. Add chicken and a little more olive oil.

6. Drain your noodles when they are done and add to the sauce pan. Stir well. Serve with bread and salsa!


Salsa Recipe

*5-6 habaneros
*1/4 cup olive oil
*the juice of 2 limes
*2 garlic cloves
*handful of fresh basil (optional) Some times I use basil, sometimes I don't.

Put in a food processor until smooth.

I use the salsa on the side and dip my chicken in it or put a few DROPS on pasta and mix into it. Again, use sparingly unless you love spice!!


Here is what the TUCO Tallarini spice pack looks like 
Satay chicken till done and then remove from pan

Add onion and garlic to pan and satay 

Boil noodles till done

Add diced tomatoes, tomato paste, seasoning packet and cumin. Cook and stir well.

Add chicken broth. Bring to a boil and simmer.

Add to the angle hair pasta and mix well


Notice my small side of salsa:)

putting the habaneros in the food processor along with olive oil, lime juice,  and garlic

Put in processor till smooth. Add basil if desired. 

Sunday, October 2, 2011

Chicken Parm Burgers


This recipe was inspired by deals at my grocery store:) They had an awesome deal on Chicken Patties so I bought a few packs. I'd never made chicken burgers before and I didn't want to make a normal burger... it sounded too boring and dry. We love chicken parmesan so I decided to make a chicken parmesan burger (healthier than the real thing since it's not breaded or fried too!!) They turned out really good and we all gobbled them right up! I will definitely be making these again!

*4 Chicken Patties (Foster Farms sells them- 4 to a package)
*4 Buns (I bought a four pack of Sweet Hawaiian Buns... YUM!!!)
*1 Cup of your favorite Marinara Sauce (We like Prego Traditional- Heart Healthy)
*4 oz Fresh Mozzarella Ball- Cut into 4 slices (I had an 8 oz ball and used half)
*Italian Seasonings
*Nature Seasonings (or salt and pepper)
*8 FRESH basil leaves (optional- we used them because I grow it in my garden. Kids went without)

1) Defrost the patties overnight in the fridge.
2) Season both sides of patties with seasonings and preheat grill
3) Grill patties until done (time varies)
4) During last minute or two on grill- add the cheese slice to each burger. Once cheese is melted, remove from grill.
5) Place each chicken burger on bun. Top with sauce and 2 basil leaves each (if you are using basil). You can also have extra sauce on the side for dipping (My husband is a dipper!)

We served with a side salad and some fresh fruit.

Season both sides of patties

Add caption

Cut cheese slices into aprox 1/2 inch slices

take off grill after cheese is melted and chicken is cooked through


place on bun and add your sauce.


Saturday, October 1, 2011

PB and Banana Pizza


I found this idea on the Cafe Moms website under the topic, "Lunch ideas to banish brown-bag blues." Another mom says she makes these and puts them in a thermos or wraps in in foil. She also packs a side cup of maple syrup or honey for dipping. I thought it sounded good, we had everything in the house I needed for it, and my kids needed something new for lunch today instead of the same ol' same ol'...
I think these would be great served for breakfast too!!

To make one pizza (8 small slices)

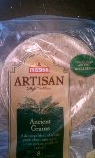
* 2 whole grain tortillas (I used MISSION brand Artisan Style Tortillas- Ancient Grains flavor (Made with 5 different Ancient Whole Grains... delicious blend of whole grain wheat, amaranth, millet, quinoa, sorghum and teff)
* 2 T PB (My family's favorite is Jiff Creamy)
* 1/2 banana- cut into thin slices
* 2 tsp spreadable butter
* 2 T honey or maple syrup (optional... it was great with or without! But who doesn't love to dip!?)

Spread 1T of Peanut Butter on each tortilla. Slice the banana and place slices scattered around on one of the tortillas (as shown below). Put tortillas together and spread 1 tsp of butter on the outside of each tortilla.

Heat up a skillet to medium heat on the stove top. Once hot, place tortilla pizza on skillet and cook for about 3-4 minutes per side. Take off and use a pizza cutter to cut into 8 pieces.

Dip if desired or just eat plain!!

ENJOY! Your kids will love them... and so will you!!


PB on each tortilla with the banana slices

spread butter on outside of tortillas 
Cut into 8 'slices'

This pizza didn't stand a chance in my household... especially when allowed to dip in syrup!!

Wednesday, September 28, 2011

Jalapeno Cole Slaw


Tonight I made my Crock Pot Pulled BBQ Chicken Sandwiches. I wanted to top them with some cole slaw with a kick so I decided to make my own cole slaw.  I like my cole slaw with a lot of vinegar and not too much mayonnaise. If you like yours creamier you can add more mayonnaise and less vinegar than this recipe calls for. Play with it and make it to your liking...

This was enough to top 4 of the BBQ chicken sandwiches. You can double, or triple the recipe to make as much, or as little as you need. I don't like left over cole slaw so I will only make what I will be eating that day. It's so easy, and quick. I will probably make more tomorrow too:)

Ingredients: 

*1 1/2 cup shredded cole slaw (Shredded green cabbage and carrots)
*1/3 cup shredded carrots (Carrots are already in cole slaw, but I like extra)
*3 T mayo (I like Kraft Mayo with Olive Oil- Reduced Fat)
*2 T APPLE CIDER vinegar (you can use less, I REALLY like vinegar!)
*1 T sugar
*Seasonings... I use Nature Seasoning
*1 jalapeno- diced

I combine the mayo, vinegar and sugar in a bowl and mix well. Add your cole slaw, carrots, and jalapeno and toss with the 'dressing'. Season and mix well.